Posts

Showing posts with the label Minor

Minor summative post | Minor

Image
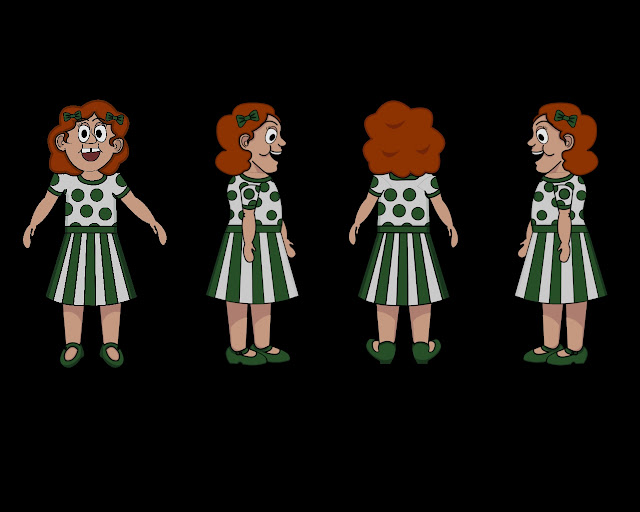
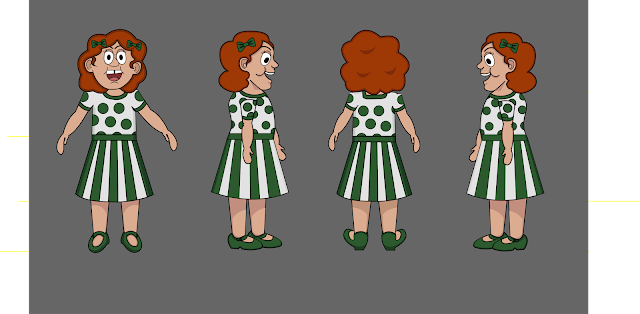
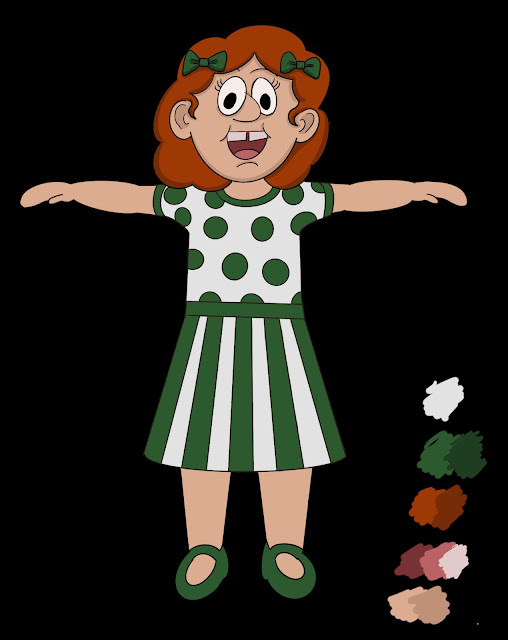
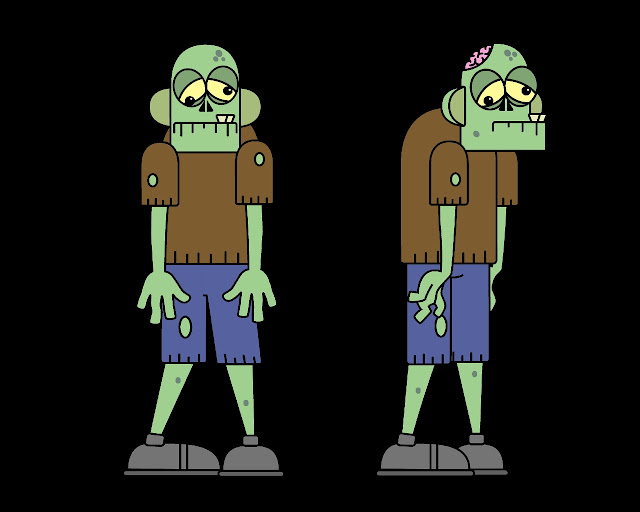
As Minor has now drawn to a close, and we move into the major project, it seemed a good idea to sum up what I have achieved in the minor project, and therefore outline what is left to be done in major. I have created a Work in Progress Art of document for the film. https://issuu.com/eleanorjaynedesigns/docs/art_of_wip_minor3 I have found balancing minor and the Extended dissertation tasks a little challenging however it has also been a huge learning curve as the 2D modelling, texturing and animation process is entirely different to the process used for 3D animation, and this is something that it has taken me a while to get my head around. I am currently working through the 2D rigging process, and this will continue over the next few days. It is a little more complicated than I had originally realised as you have to complete a complex process four times for each model. I also still need to construct the environments as 2D planes, and test animate these, as well as figuring o...

@Alan renders coming out low quality

Image
I am trying to do test renders for the Ellie model to ensure that the textures are working well, and I am currently having an issue where the renders are coming out very low quality despite a normal number of passes and a 1920x1080 pixel ratio and 300 dpi resolution. I don't know if I'm missing a setting, but this is what they are coming out like.

Ellie Modelling and Construction | Minor

Image
The modelling and construction process for Ellie is now completed, and all four views are ready for rigging. This will be my next process to engage with. I am aiming to get this completed for the front view ready for the minor check in on Monday, so that I can potentially get a walk or movement demonstration done for the check in and prove the functionality of the model and rigging. There are a few elements of the model that I'm not entirely convinced will work, which may need some adjustment or re-texturing to make sure they work.

Ellie Four Views | Minor

Image
This is the four views version of Ellie, which will b used for assembling the model in Maya to ensure that she is positioned correctly when assembling the planes. This also acts as a finished turn around for her, however this one is assembled in illustrator rather than being hand drawn. I have also completed the all views version for construction. These look a little scary at the moment but will hopefully look ok in the final version.

Ellie Pieces | Minor

Image
The files I had previously made for the turn around of Ellie looked OK at the correct size, however when scaled the quality deteriorated badly, so I've had to recreate each view in illustrator so that the quality will be good enough for the animation process. I have included these broken down high quality versions below. I am now moving into the rigging process for Ellie tomorrow, in the hopes of being able to have at least one walk cycle done for Monday's checkpoint. The first thing I need to do before using these is to scale them all so they are the same size. As these were drawn separately I need to readjust these.

Ellie turn around | Minor

Image
This is the turn around for Ellie. I had to alter her nose a little to make her features work. I am just finishing the pieces views and these will be uploaded later today.

Ellie front and back design | Minor

Image
Here are the front and back designs for Ellie. The side will be coming in the next couple of days. Once I have these completed I can create the pieces to then assemble the models for 2D

Zombie tutorials - Front and Left View | Minor

Image
Today I completed the assembly on the front view of the zombie. This is getting faster every time I complete it so I feel like I am making progress. I have decided that I will only model and rig the left and front versions of this character. The rear will the very similar to the front, and the right view will mirror the left, so this way I can progress quicker and move on to working on my own characters. So here are the two views. Rigging to come soon!

Zombie 2D rigging tutorials progress | Minor

Image
I am currently working my way through the zombie 2D rigging tutorials we have in order to discover how the 2D animation process works in Maya. I am making some progress with this and so far it all seems fairly straight forward. I have successfully modelled, textured and assembled the zombie, and intend to complete the rigging sections tomorrow. The thing that is the most different in these 3D tutorials is that despite the model looking normal in the front view, the only one tat will be seen in the final animation, the model is actually slit a long way apart in the perspective view. This is to prevent view-port errors and clipping, but makes looking at it a little odd for someone used to 3D models and rigs. 

Nelly character concept art | Minor

Image
Today I tried to do some facial concept art for Nelly. The thing I am struggling with at the moment is the balance between realistic as this is the ‘real world’ section and a style which will be easier and less complicated to model in Maya. This art is far too complicated and realistic to be modelled in the timescale in which I have to do it, so I will have to go back to the drawing board as it were and try again with a more simplified style. The Orthograhs I did for her were in a much more simple style, so I think I will return to these and build upon them in a slightly more cartoony style. 

Ship Modelling Update | Minor

Image
Today I worked more on the ship model for my animation. This included simplifying some of the geometry. This was the rendered result. I'm quite happy with this, and the geometry is looking much better than it was. With the lighting and shadow too, the boat is looking a way I am quite happy with.

Nelly Orthographs | Minor

Image
Below are the initial orthographs for Nelly. She will be 3D modelled to be in the initial “real world” part of the animation. Front view Orthographic Side view orthographic

Ship Body Model v2 Complete ship | Minor

Image
I finished redoing the model in today's Maya class

Ship model Body v2 | Minor

Image
After a discussion with Alan, the initial version of the ship's main body was wrong due to the geometry not flowing and this would cause issues with UVing and texturing the model. Therefore I restarted the modelling with planes, and extruding these to create a track that I could then fill in. This will allow a more successful process.  Unsmoothed Smoothed

Ship Body Blocking | Minor

Image
Today I got the rough blocking for the rest of the body of the ship done. This still needs a few tweaks but it getting there. I am a bit confused as to what to do with the top of it as this is something that simply doesn't look right. I think I'll bring this up with Alan on friday. The masts and sails will be made as 3D elements as otherwise they would not work in terms of the sails and flag moving in the wind.

Desk chair orthographs | Minor

Image
Below are the desk chair Orthographs. These are part of the fully 3D CG section, so this has a lot more detail in it than the 2D ones. As a 3D model it also has a front, side, back and 3/4 view to aid modelling.  The 2D ones will only have a front view due to how I am making the models.

Pirate ship modelling | Minor

Image
Today I began the modelling of my pirate ship. In realised that I made this a little frustrating for myself due to the irregular and stylistic way that I chose to draw the ship.  Overall I’m happy with how this is looking so far, I applied coloured lamberts on he windows to make it easier to see how they will look roughly when textured. I intend to continue this tomorrow as well.  A little note is that the reason the orthograph is slightly pink in the background is that this helps me model more easily as I struggle with black lines on white paper. Making this a pale pink makes it easier for me to see. 

Assets to be produced | Minor

Image
I decided that to help me move ahead on the production of my Pugwash film, I needed to figure out exactly what elements I needed to produce in order to be able to move forward with my film. I am still working on my animatic, and have yet to make it look as i would like it to. I am also facing a bit of delay on this due to Adobe issues, which I am attempting to fix. However, below are the elements I will need to produce for the animation. Matte paintings Bedroom (Nelly) Party room Above the world On board the ship Cave Landscape of colouring Ryan’s workshop Props - 2D 2x leg “trees” Chair (party) Waves Shrimp Volouvants Mouse (this may need to be 2D rigged) Champagne cork Hand with cigar Pirate ship Sharpening trees Erasers Ink bottles (5 different styles) Paint bottles Paint brushes Props - 3D Chair (bedroom) Computer Mouse Glasses Speakers This list should hopefully guide my process a bit more. I will produce orthographs for these. Th...

Updated Script | Minor

After showing some people who were unfamiliar with the project the script, they all expressed that there were a few gaps in the narrative, therefore I have updated the script as below. One note to make is that I have some interactions with the crew in brackets. This is because as of yet I have not decided whether I want additional characters in the crew of the film or not. This will largely depend on how long the rigging and animation process will take for each character. This should become apparent in the upcoming tests. Pugwash Script v3 by Eleanor 'Nelly' Luckett on Scribd

Animatic opening scene | Minor

Image
This is the opening scene animatic first draft. The animatic is still very rough at this stage, as I think there will need to be changes to the pacing and other elements before the final animatic. However, please find below the animatic first draft for this section. The last few seconds does look a bit like an animator's nightmare, however this is the intention as it kick starts the daydream sequence. The sequence also currently has no sound. This will be added when piecing it all together later.